Copyright © Rogue Amoeba Software, Inc. All rights reserved.

With the Live Stream block, you can stream audio from your Mac to RTMP-based services like Facebook Live, Twitch, and YouTube Live. While RTMP is often used to stream video, the Live Stream block is focused on transmitting audio feeds, with supplemental video automatically created for you. Using Live Stream, it's a snap to offer a live feed while recording a podcast, and easy to transmit content like live events, concerts, and DJ sets as well.
This page provides information on configuring the Live Stream block, as well as other tips.
Let's walk through how to configure your stream, starting from the Setup area at the bottom of the popover and working up to the top status line.
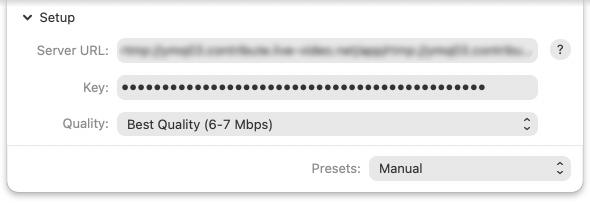
The Setup section is where you'll enter the details for the service to which you'll be streaming. Be sure to enter the Stream URL and Key details correctly to enable the Live Stream block to connect and transmit.
For help connecting to the most popular RTMP-based streaming services, visit the “Notes on Audio Hijack's Live Stream block” article in our Knowledge Base.
In addition to entering server details, you can select your desired encoding quality here. The Live Stream block supports three quality levels, Good, Higher, and Best.
| Quality | Resolution | Frame Rate | Audio |
|---|---|---|---|
| Good | 1024px x 576px | 15 fps | 96 kbps AAC |
| Higher | 1280px x 720px | 30 fps | 128 kbps AAC |
| Best | 1920px x 1080px | 30 fps | 320 kbps AAC |
Note that broadcasting with Live Stream requires significant bandwidth, and higher quality levels use more bandwidth.
Settings will be saved between launches, so once the Setup section is properly configured, you likely won't need to change it.
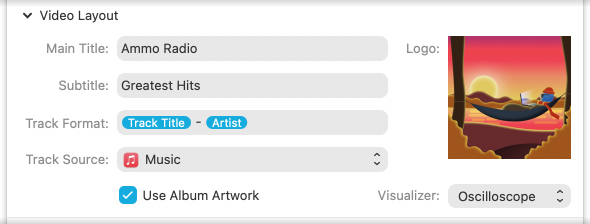
The Video Layout section is used to create the supplementary video feed for your stream. Adjusting the settings here will change what's seen by those who tune in to your stream.
The Main Title and Subtitle text will be overlaid at the top of the video stream.
You can also adjust the track titles which will be shown in the stream. The Track Title field can be customized to adjust which metadata is included. Audio Hijack can automatically pull metadata information from supported Mac applications by setting the Title Source option, or it can pull from a “Now Playing.txt” file. You can even manually enter titles, by editing the Track Title field by hand.
Artwork, either pulled from the Title Source or set as the Logo will automatically be used in the creation of the video stream as well. In addition, you can add a simple Visualizer to the bottom of the video feed.
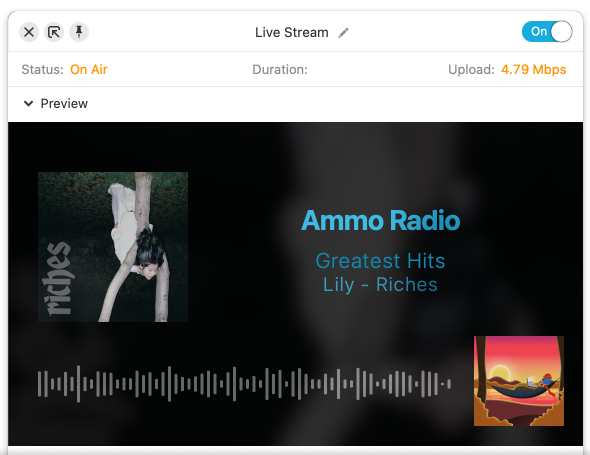
The Preview section shows a large preview of the supplementary video feed. Use it to see how the stream will appear to those who tune in.
The supplementary video is created using the information provided in the Video Layout section. It will show text in the right two-thirds of the frame, with the Main Title text in large font and the Subtitle and Track below in smaller font. Text colors are chosen automatically, and are based on current artwork, if available. Provided artwork is shown in a square on the left third of the frame. If both album artwork and a logo are provided, the logo is placed in a smaller square in the lower right corner. When the Visualizer is on, it appears in the lower third of the frame. Finally, the background incorporates a zoomed-in, blurred, and darkened version of provided artwork.

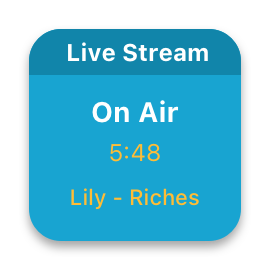
Finally, at the top of the Live Stream block is the status section. This shows data about the stream itself, as you're transmitting, and resets with each new connection.
← PreviousNext →Transcribe BlockBroadcast Block